集成MSBuild自动构建混淆.NET程序集
将恒盾 C# 混淆加密大师的 CLI 接入 MSBuild,可以在 Release 构建完成后自动保护 DLL 或 EXE。Visual Studio、Rider、dotnet build 和 CI 构建都可以使用同一套配置。
1. 准备 CLI 和配置文件
- 安装恒盾 C# 混淆加密大师,在安装目录找到
CLI.exe。 - 在软件中配置混淆选项,通过“文件 > 导出配置”生成
obfuscation.csop。 - 将配置文件放在需要保护的
.csproj同一目录。
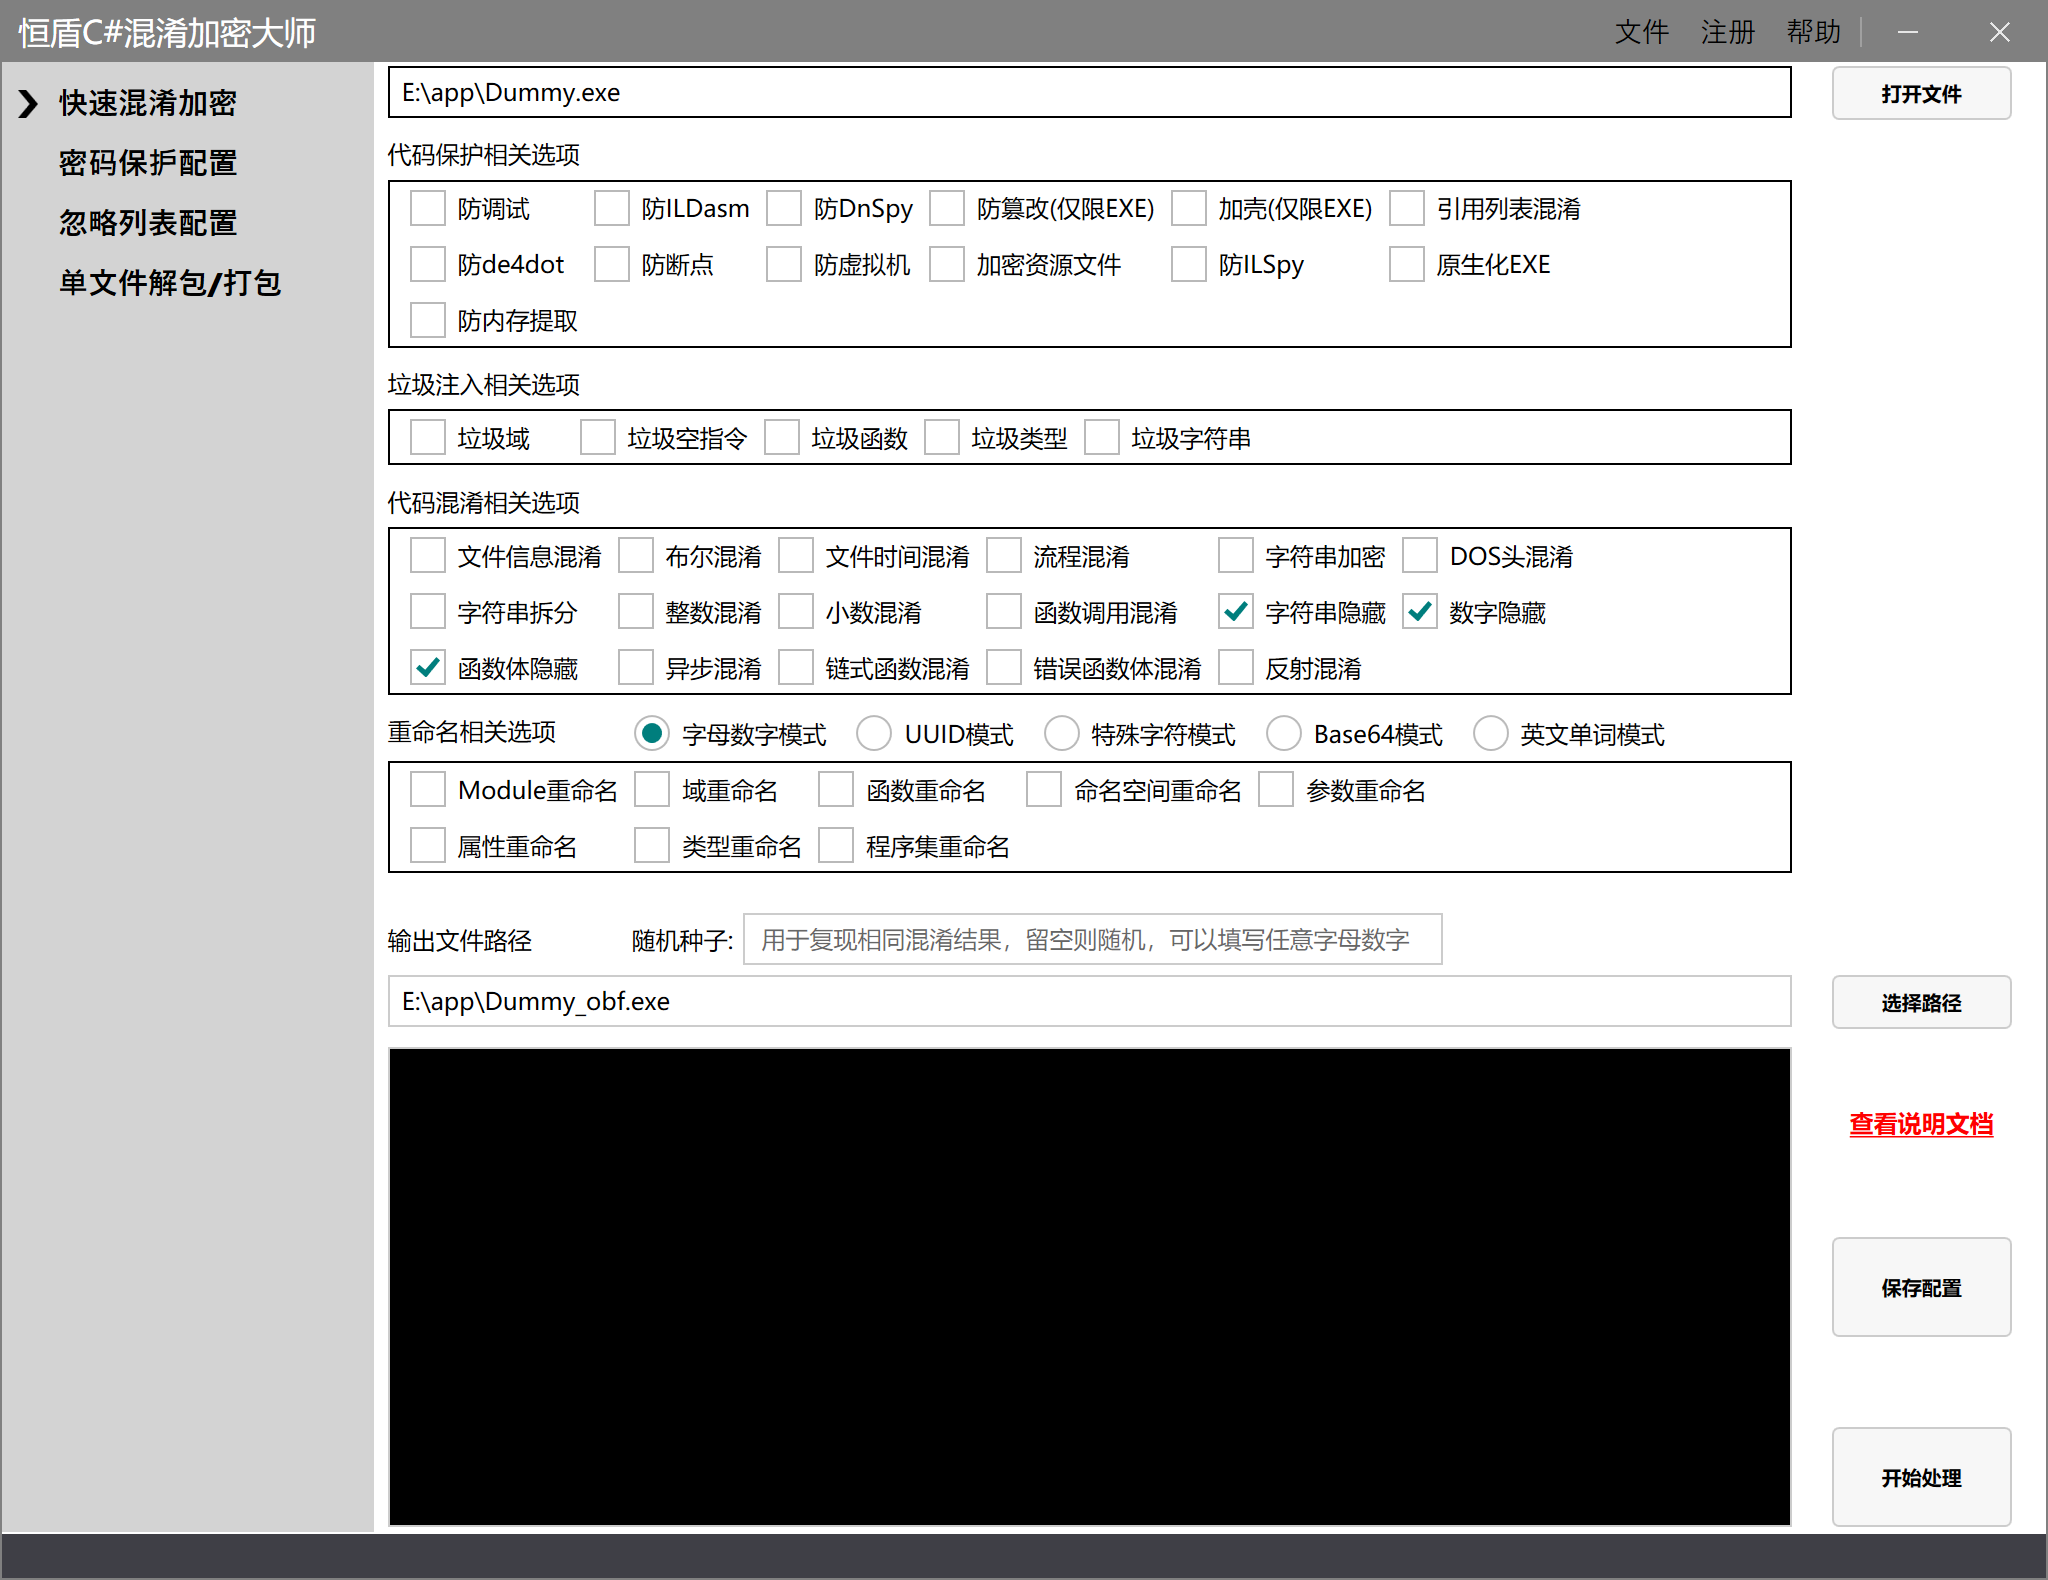
配置文件中的输入和输出路径可以保留示例值,构建时会通过命令行参数覆盖:
{
    "ModulePath": "bin/Release/net10.0/MyApp.dll",
    "OutputPath": "bin/Release/net10.0/protected/MyApp.dll",
    "AntiILDasm": true,
    "StringConfusor": true,
    "IntConfusor": true,
    "FieldRename": true,
    "MethodRename": true,
    "ParamRename": true,
    "TypeRename": true,
    "RenameMode": 1,
    "Seed": "my-project-release"
}
实际使用时请保留软件导出的完整配置,不要只使用上面的示例片段。
2. 配置 CLI 路径
不建议把个人电脑上的绝对路径写入项目文件。可以在当前 PowerShell 会话中设置环境变量:
$env:OBFUSCATOR_CLI_PATH = 'C:\Tools\CSharpObfuscator\CLI.exe'
也可以在单次构建时传入路径:
dotnet build -c Release -p:ObfuscatorCliPath='C:\Tools\CSharpObfuscator\CLI.exe'
3. 在 .csproj 中加入构建目标
在项目文件的 </Project> 前加入以下内容:
<PropertyGroup>
<ObfuscatorCliPath Condition="'$(ObfuscatorCliPath)' == ''">$(OBFUSCATOR_CLI_PATH)</ObfuscatorCliPath>
<RunObfuscator Condition="'$(RunObfuscator)' == '' and '$(Configuration)' == 'Release' and '$(ObfuscatorCliPath)' != ''">true</RunObfuscator>
<RunObfuscator Condition="'$(RunObfuscator)' == ''">false</RunObfuscator>
<ObfuscatorConfigPath>$(MSBuildProjectDirectory)\obfuscation.csop</ObfuscatorConfigPath>
</PropertyGroup>
<Target Name="ObfuscateReleaseOutput"
AfterTargets="Build"
Condition="'$(Configuration)' == 'Release' and '$(RunObfuscator)' == 'true'">
<PropertyGroup>
<ObfuscatedOutputDir Condition="'$(ObfuscatedOutputDir)' == ''">$(TargetDir)protected\</ObfuscatedOutputDir>
<ObfuscatedOutputPath Condition="'$(ObfuscatedOutputPath)' == ''">$(ObfuscatedOutputDir)$(TargetFileName)</ObfuscatedOutputPath>
</PropertyGroup>
<Error Condition="'$(ObfuscatorCliPath)' == ''"
Text="RunObfuscator=true, but ObfuscatorCliPath or OBFUSCATOR_CLI_PATH is not configured." />
<Error Condition="!Exists('$(ObfuscatorCliPath)')"
Text="Obfuscator CLI was not found: $(ObfuscatorCliPath)" />
<Error Condition="!Exists('$(ObfuscatorConfigPath)')"
Text="Obfuscator config was not found: $(ObfuscatorConfigPath)" />
<RemoveDir Directories="$(ObfuscatedOutputDir)" />
<MakeDir Directories="$(ObfuscatedOutputDir)" />
<ItemGroup>
<ObfuscatorCompanionFile Include="$(TargetDir)**\*"
Exclude="$(ObfuscatedOutputDir)**\*;$(TargetPath)" />
</ItemGroup>
<Copy SourceFiles="@(ObfuscatorCompanionFile)"
DestinationFiles="@(ObfuscatorCompanionFile->'$(ObfuscatedOutputDir)%(RecursiveDir)%(Filename)%(Extension)')"
SkipUnchangedFiles="true" />
<Message Importance="high" Text="Obfuscating $(TargetPath)" />
<Exec Command=""$(ObfuscatorCliPath)" obf --config "$(ObfuscatorConfigPath)" --input "$(TargetPath)" --output "$(ObfuscatedOutputPath)"" />
<Error Condition="!Exists('$(ObfuscatedOutputPath)')"
Text="Obfuscator did not create the expected output: $(ObfuscatedOutputPath)" />
<Message Importance="high" Text="Protected output: $(ObfuscatedOutputDir)" />
</Target>
这个目标会:
- 只在
Release配置且已找到 CLI 时执行。 - 保留原始构建目录,不覆盖原始程序集。
- 将依赖 DLL、
.deps.json和.runtimeconfig.json复制到protected目录。 - 在 CLI 返回错误或没有生成目标文件时使构建失败。
4. 执行构建
执行 Release 构建:
dotnet build -c Release
生成目录示例:
bin/Release/net10.0/
├─ MyApp.dll
├─ MyApp.deps.json
├─ MyApp.runtimeconfig.json
└─ protected/
   ├─ MyApp.dll
   ├─ MyApp.deps.json
   └─ MyApp.runtimeconfig.json
发布时使用 protected 目录中的文件。Debug 构建默认不会执行混淆;如需临时跳过 Release 混淆,可以执行:
dotnet build -c Release -p:RunObfuscator=false
构建日志中出现以下信息,表示目标已执行:
Obfuscating ...\bin\Release\net10.0\MyApp.dll
Protected output: ...\bin\Release\net10.0\protected\
5. 在 CI 中使用
CI 中先设置 CLI 路径,再执行相同的构建命令:
$env:OBFUSCATOR_CLI_PATH = "$env:OBFUSCATOR_HOME\CLI.exe"
dotnet restore
dotnet build -c Release --no-restore
上传制品前,可以检查受保护的程序集是否存在:
$protectedFile = '.\bin\Release\net10.0\protected\MyApp.dll'
if (-not (Test-Path $protectedFile)) {
    throw "未生成混淆后的程序集: $protectedFile"
}
注意事项
- WPF、WinForms、类库和 ASP.NET Core 项目都可以使用
$(TargetPath)保护主程序集。 - 使用反射、依赖注入扫描、JSON 序列化、XAML 绑定、插件加载或 P/Invoke 时,重命名可能影响运行,请配置忽略列表并回归测试。
dotnet publish会重新整理publish目录。普通发布应在发布完成后再处理主程序集,不要直接把未经检查的publish目录作为最终制品。- 启用
PublishSingleFile时,应将发布得到的单文件 EXE 作为 CLI 输入,并单独验证混淆后的程序。